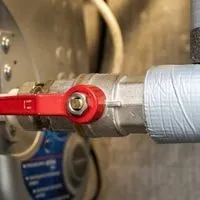
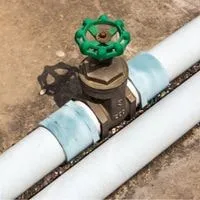
Replace shut off valve without turning off water. Here the question occurs, Is it possible to replace the shutoff valve without turning off the water? So the answer to this question is yes.
You can do it, and no issue occurs like water waste. It can be covered with other material that does not allow the water to flow waste and stops the water’s leakage.
This is very easy; if you turn the water off, you have to turn the water back on, and then the water comes into your taps. But in this procedure, you can not need this type of thing. You block the pipe to avoid water flowing and place it back when replacing the valve.
Replace shut off valve without turning off water
You can replace the water shutoff valve without turning the water off, it is straightforward, and I will explain the procedure I think you can also review that this was very easy, and we get the benefit from it. The process of replacing the shutoff valve is given here.
Step 1. Gather the tools which are required
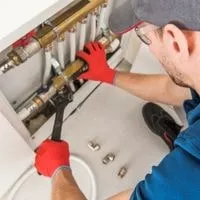
In this step, you have to gather all the tools and also the things that are used for the replacement of the shutoff valve. The tools, screwdriver, wrench, new valve, things used to stop the water, water to wash your hands, etc.
These are all the tools, and almost they are present in every home, and you do not take them from the market, especially for that purpose.
These are things that are commonly present in the home. Gathering the tools is a perfect thing, it can help you in your work and save time. Before starting this type of work, you first have to gather all the tools and start work next.
Step 2. Start opening the valve
This is the second step, and this step occurs when you have gathered all the tools and start opening the valve by using the suitable tools.
Take the tool and fix the valve in the tool and start twisting this tool. Twist it until it does not come in the position to open by using hands. Twist it and open the valve to replace the valve.
Step 3. Stop the water
Now when you open the valve, you have to stop the water which starts flowing due to the opening and taking out of the valve which you are going to replace.
Take the material you think is good for stopping the water, and you have to gather this with the tools and insert it if it is the condition that it stops the water by inserting it in the valve.
Or if it is the material, is that as the top, and you covered the area of the valve. Your water has stopped.
Step 4. Take the new and open it
In this step, take the new valve and open this from the cover, take it out and remove all the coverage of the valve. And ready it for the replacing. You do not take the valve exactly when you are taking it from the market.
You have to open and check it, then replace the valve by taking the material out from where you have sealed the water coming out.
Step 5. Place and adjust the valve
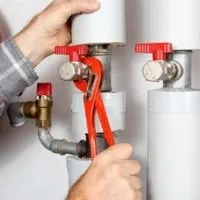
In this step, you can remove the material from the blockage of the water, then check the direction of the valve and place it carefully in its place. Otherwise, you have to waste the water, which is not placed well.
Now that you have adjusted the valve in its place take the tool used for twisting, setting, placing, and tightening the valve tight the valve in the place from where you have to replace it. Adjustment is used for the fixing of the valve.
Step 6. Close all the things
This is the thing that is necessary for this type of procedure. You have to close all the things that you use for this procedure. Some of them may be wasted by taking them from that place and keeping them in the other place you use to keep the garbage.
Also you have to clean the area which is wet with the water that leaks when you take the valve out and when you place it back.
When both things are done, your work is complete, and you do not have any remaining tension. Now your work is done, and you can take a rest and chill.
How to install a new valve
Related Guides