
Moto x 2nd gen replacement screen. Moto x is the name of the mobile phones of Motorola, and these are of 2nd generation, these mobiles are very good in the quality, and this company’s mobiles are very best.
There is no doubt about them, but each and everything that is designed can get worse. Everything has an expiry date, and this does not work after this, there is the same case.
The mobile moto x 2nd generation screen get worse it maybe falls or other issues that break the screen and create an issue, so here you have to replace the screen of that mobile and the procedure of that thing, I am going to tell you.
Moto x 2nd gen replacement screen
There is the procedure about the replacement of the screen is given, and when you follow this procedure step by step.
Then you came to know how you can change this and see that the issue is how much, is it soled easily or not and you are also get experienced about this thing. The procedure for this is given there:
Step 1: Take the mobile and examine it
This is the very first step, and there you have to take your mobile and examine it correctly this examination is that you should see all the corners and sides of the mobile and check from where it is going to open because you may not be aware of this thing.
After all, this is your first experience, and you are a total stranger to this thing. Now when you properly examine it, then go to the next step.
Step 2: Turn off the power

Now turn the power off of the mobile, and avoid all the things that are not good for your device. When you open the set, you must power off the mobile.
If you are not powered off, this may create a big problem for you and worsen the cell. So, please turn the power off the mobile and do not allow it to work while replacing the screen.
Step 3: Take the sim cards out
Now that your mobile is powered off, you must take the sim cards out. This is also a very important thing about the mobile phone; you take the sim cards as when you open the phone ultimately this mat damages the sim cards, which is not good for you.
These mobile are not open easily. They use the pins and then open them. So here, take this pin, open the jackets where you insert the sim, and take the sims from that place.
Step 4: Start opening
This step takes the procedure closer to work; now, when you remove the sim tray, do not put the pindown. Take this pin and insert ore where you have removed the tray containing the sims.
Apply force it downward of the mobile and take the outer cover outward; when you take this cover outside, take the knife and start pushing it out from the mobile by using it.
Step 5: Start removing the cover carefully

In this step, when you start removing the cover, remove it carefully and slowly as some clips are joined. When you remove it with a sudden jerk, this is not good for the clips as you use this mobile after repairing the screen, so if these clips are damaged.
Then this creates an issue in the closing of the cover; slowly remove the cover and take care about the clips, so that this does not get damaged. Some wires can be damaged when you remove them without using any tool, so use some tools and remove the cover carefully.
Step 6: Lift the cover-up and remove screws
When your cover is removed carefully without any loss, you have to lift the cover-up and see the mobile from inside; there are wires, a battery, and all the internal components.
When you remove the components, you see that some screws are very small; start removing these screws and remove all these screws one by one.
These screws are necessary to remove as they are very small, and they are used for the closing of the sensitive components; these components are enclosed in the special cover; otherwise, they are damaged and do not repair easily.
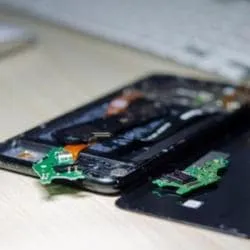
Step 7: Remove other components that are necessary to reach the screen
Remove all other small components that are attached to the internal of the phone, remove. All these small components remove clips holding the whole device and then take the panel up that contains the components in the phone and manage the whole working of the phone.
Now when all the clips are taken up, then you have to take this circuit board or the circuit board up and separate this from your set, and now in this step, you have almost reached the screen of the phone about which you are searching and which you are going to replace by the new one.
Step 8: Now change LCD
In this step, you have to change your LCD. Here the LCD is attached to the nuts, remove all these nuts and then reach the screen where you have to change the LCD screen, and this screen changing is effortless and pleasing.
After removing the nuts, take the old LCD up and replace it with the new and install this new LCD in the place of the old. This is the whole procedure of the replacement of the screen.
Step 9: Reassemble the screen
This is the last step in this step. You have to reassemble the screen; this is the procedure about which you are well known and you are aware. Reassemble all the components the same but in the reverse of the start; I think you remind you how you open the screen.
Now reassemble this screen, and your work will end. This is the whole thing you are searching for, and it ends here, where you have to reassemble all the parts you take off to replace the screen.
Put the circuit panel back and join this, attach all the other small and big things back, close the phone, and now you can use your phone. This is in excellent condition.
Related Guides