How to dry out floor after leak. A wooden floor always gives an alluring look to your home. But there is always some description that requires their fulfillment to maintain the stability of a character(Wooden Floor).
For many reasons, you must know that a combination of wood and water is familiar. If the water gets in touch with the wooden floor, actually it’s not a pleasant situation.
A wooden floor that adds adorability and stability to a surface gets ruined when it interacts with the water. So, take immediate action whenever your hardwood is attacked by leakage.
So, to reduce the chances of mold or any further damage like a collapsed floor, it would be better to take some intellectual steps to dry the floor after the leak.
A Guide For How to dry out floor after leak
The wooden boards have great potential to suck up the water in them. But its consequences are unsafe, so you must go through an accurate way to eliminate the dampness from the wooden floor.
If you think that your wooden floor is coated and has the capability of water resistance that will save it from floor damage because of water, then don’t take any chance.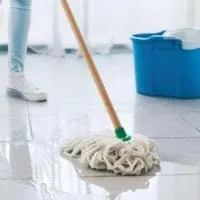
There are many ways to enter moisture into your wooden boards, including the damaged coating beneath the wooden boards from the heating registers, etc.
If you know the disadvantages of the absorbed water in the wooden floor and seek an accurate guideline to dry it, then you are at the right place. You may find your answer in the following article.
Steps To Dry Wooden Floor Completely
Taking some steps to dry the floor is much better than waiting prolonged by expecting that nothing will happen badly. Don’t forget that small laziness can effects your pocket badly if it gets damaged to its death sentence and you have no option left except a replacement.
Required Material
To accomplish the task, you are required to use some tools that are mentioned below.
- Dehumidifier
- A Bucket
- Non-Foamy Cleaner
- Stiff and Scrub brushes
- Washing Soda
- Wooden Floor Cleaner
- Mob or Rag
- Squeegee
- Wet Vacuum
- Hummer with Flooring Nails
- Fan
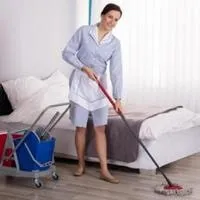
1. Take Out The Places Accessories
If you want to dry an item, you will try to contact the air directly or make a ventilation system.
If you suspect the floor is moist and requires a deep drying procedure, you need to take out the things on the floor.
It may include the carpets, mats, rags, or any other furniture or accessories that require moving to another damp-free place. Placing the items in the sunlight would be a better option if you find them watery.
Moving all the things will also eliminate obstruction in the drying process. After clearing all the damp things or clearing from the damp surface, you may proceed with the next step.
2. Remove the Excessive Water
In the following step, you need to inspect the wet area. If it can be handled by using the towels and rags, go for it but proceed with the steps if it’s possible to absorb the water with the rags or towels.
If a large area can’t be coped with using towels, then using the wet vacuum would be helpful. You have to vacuum the area until you are sure that all the water is sucked into the vacuum.
Another helpful tip you may follow while vacuuming is that even though you can’t find standing water on the surface, if there is a watermark, a vacuum that area too.
Vacuuming should be done closely as it will help suck the tiny moisture from the hardboards’ grooves, cracks, or pores.
3. Clean the Floor With Non-Sudsy Detergent
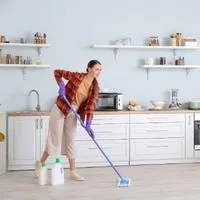
It might sound silly to clean the surface with detergent after sucking the water before. The leakage water that had attacked your floor before might left dust or debris in the tiny pores or grooves.
That may be laying on boards with water as well as bacteria. Bacteria infestation and the existence of dirt or debris lead the issue of severe damage to the surface.
To tackle the issue, you need to clean the area with non sudsy detergent and a stiff brush that will not harm the floors while rubbing.
After ensuring that all the unnecessary particles are eliminated from the wood, you may remove the water using a wet vac. Now, to the left no risk of damage; it would be better to clean the surface using wood floor cleaner.
It’s a bit tiring step, but hard work will save you from severe damage. So after cleaning with the wood cleaner, wash with clean water and remove the water as you have done before.
4. Dry Floor with Dehumidifier
It might be possible that the floor is appeared dry, but there is a high chance of going moisture deep under the wooden planks. Removing the moisture beneath the planks is ineffective using only the wet vac.
So to eliminate the water beneath the wooden surface, using the dehumidifier is the best option. Adjust the dehumidifier on its high settings and keep it in the middle of your affected area. It would be better to leave for a whole day and night.
Secondly, you may use fans for perfect air circulation. If you are doing the drying process on a subfloor and there is a section under the floor, then you have to do a task there too.
So, you need to place the fans on the lower sections and ensure that the direction of the air is towards the wet surface. Don’t forget to open the door and windows if it’s not a humid climate outside.
5. Detect Mold on the Surface
A wet surface can experience mold. So it might be possible that your surface has mold too. It would be better to inspect mold before it conveys terrible consequences to you or your family.
It may lead to breathing issues and create allergic reactions while living in a place with mold. So it would be best if you inspected the floor when it dried.
If you find any sign of mold, you have to take a step to eliminate it. Most people prefer using a solution of lukewarm water with baking soda. After cleansing the surface with the solution, you have to dry it.
6. Inspect the Dampness
You must check whether the wooden floor is dried in the following step. To accomplish the task, you may use a moisture meter.
If you are testing the moisture the next day of the drying procedure, it might be possible that it will give the readings of containing moisture.
Don’t hassle. It normal. Drying the leakage water from the wooden floor is not an easy and quick task. Even after proceeding with a long method, you can’t get instant results.
So, drying the wood completely will surely take time, but it will surely. You must maintain the air circulation system by opening the windows(if there is no humidity outside) and using fans.
But don’t let the floor dry itself. It may damage the surface if it saves water for too long. Make necessary steps to keep the air circulation in the upper and lower sections.
Bottom Line
We hope the following article will help you to dry a wooden floor after a leakage with valuable tips. Following these guidelines can eliminate the chances of damaging your floor.
We suggest taking quick action when you see your wooden floor wet. If you find the task lengthy or lacking time, you may call a professional to dry your wooden floor.
Related Guides