How to reset Liftmaster garage door opener. Liftmaster garage door openers are among the best door opener that is remotely controlled.
There are some circumstances where you need to reset your garage door opener. Door openers sometimes get problems and that time may need to reset it.
When the door opener gets damaged, lost or if you have changed it, you need to reset it. You need to reprogram or reset your Liftmaster garage door opener to delink the devices connected to the door opener, and to reconnect another device.
Tools need to reset Liftmaster garage door opener
- A stepladder to easily reach the motor level.
- A remote-control device
- A ballpoint or any object with a short edge.
How to reset Liftmaster garage door opener
Resetting the Liftmaster garage door opener is an easy task if you know some basic things. Start by accessing the door motor, it is usually located at the top of the door.
Now check the panel and remove the top cover to reach the panel. Erase the memory of moto by pressing the “learn” button. Now de-link other devices and finally retest the remote to check if the door opener is reset.
let’s explore it further detailed discussion.
Access the door motor
The very first step in resetting the garage door opener starts with accessing the motor. Take a ladder and put it in front of the garage door. Climb the ladder to make easy access to the door-motor.
Locate the panel: Now try to look for the panel, and its placement depends on the type of unit. Access the panel by pulling the compartment down until it comes down from the motor, the panel will not fall as it has the support of hinges.
After lowering the light panel, you will be an encounter a series of instructions, and there is a small control panel and light bulb.
Observe the control panel and find the learn button (yellow and round or purple and square). The color and shape of the button are dependent on the type of unit/ model.
Erase machine memory for all saved records
In this step, you are going to erase the motor’s memory to get all data related to remotes and other non-key methods.
To erase the motor memory press and hold the learn button with your fingers or some pen for at least six seconds. When you press the learn button an LED light will turn on, keep pressing the button until the LED light goes off.
This will help you in erasing all keyless entry codes and remotes connected to the device earlier.
Remove/ de-link all smart devices
Well, the above method erases only remote and keyless entry codes, to remove the smart devices you have to press the learn button again for the six-second un till the light turns off.
This will clear memory and all connected smart devices will be unconnected.
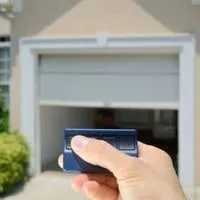
Test the remotes
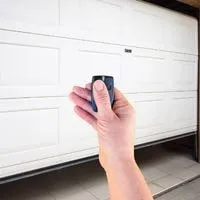
Well after doing all this hard job you must test the remote to make sure it’s delinked.
For this purpose, press the button of your remote, if the door is not closing or opening it means you have successfully reset your garage door opener.
Conclusion
It happens with many homeowners that after shifting to a new place or due to damage or other factors they face problems with door openers. The best option is to reset your garage door opener for safety purposes also. Reset your garage door opener and then re-link your device for easy and safe access. Always pay attention to your door openers to keep it working.
Related Guides