How to repair water damaged wall studs. Water is the main need of the home and we all did not live without it. But if there is an issue that comes with it then it can create big issues for you and you can not solve this easily if get more flexible or big.
You should solve these issues soon as they do not get big. Here the issue is with the wall that is damaged by the water and you have to solve it. When water starts leaking it can be damaged and can cause an issue with the walls and also interrupts the electricity.
How to repair water damaged wall studs
The repairing of the water damaged-wall studs is very easy and some steps are used for it. Here also some tools are required which are best and you can use them for the completion of your work. The tools which are required are:
- Two different types of epoxy
- Hammer
- Nail gun
- Putty knife
- Brush that is usually used to paint
- Tape
- Safety goggles
- Mask
- Gloves
Now the process of repairing the water-damaged wall studs starts and these are some steps that are used to proceed in the work.
Turn off the power
You have to turn off the power of the whole home as the procedure we are going to start can affect the power and this can be the cause of the issue that destroys the home.
Water and power both are things that are opposite to each other and when they both gather at the same time they are the cause of the big blast because there is not any joint of them when they join they are the cause of the blast.
Because the water is the cause of the electric current and when water interrupts in the power then it can start burning all the things which are connected to it. So in these types of matters, you have to turn off the power first and then start working next.
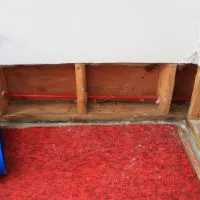
Identify the damaged area
After the power is off you have to identify the area which is damaged and which you want to repair. Identification is necessary.
When you identify then you have the idea that which thing you nd how many times and all the other things required to complete the process. Identification is the best thing and after identification, you have to start working.
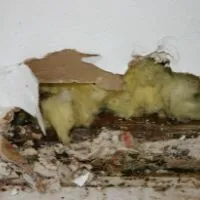
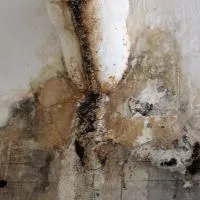
Use a knife to remove the molds
When you identify the area which is damaged by the water then take the knife and start working from it means you have to remove the molds that are on your wall and they are made from the water which is leaking, mostly these are on the walls which are painted.
These molds appear due to moisture. A knife, and hammer, are the tools that are required to remove the molds that are on your walls.
Check the source of damage
You have to check the source first from all things if you have checked the source then you have come to know about the root of the problem and if you are aware of it then next time you avoid this thing.
The Source of damage is necessary to know and repair, when it gets repaired it does not get worse again soon. You have to cover the leakages which are in your plumbing systems. The issue is maybe with the pipe which carries the water from the source to your taps.
Start digging
You have to start digging when you know from where the water starts leaking and dig this to set it in the proper way from the roots.
You have to dig the wall and then start which is the solution to the problem and repair it. In the process of digging, you should remove the damaged area and solve the problem which is with the plumbing.
Use epoxy
Epoxy is used to join or repair the digging thing. Now when your plumbing problem is solved so here you have to repair the wall by using epoxy. Apply it to repair the wall, apply one coat of the epoxy and wait for the time which is required for it to get soaked or dry.
As I told above that there are two epoxies are used here after the drying of the first you can apply the second epoxy and now wait for it to get dry.
Apply both same in the way that no gap remains between the walls and there is not a small gap remaining. The epoxy is the thing that completely repairs the wall.
Apply the paint
After the epoxy, you have to apply the paint on the wall because the wall that you have to dig is repaired. Painting of the wall is important for the wall and how to repair water-damaged wall studs if your wall is painted before the repair.
Paint can also change the look of the wall when the wall is not painted then the repaired patch looks changed from the other wall but when you paint the wall then it looks beautiful and the repaired change does not feel very appealing.
Explain
Summary
The above is the process of repairing a wall that is damaged through the water leakage, in the procedure some tools are not discussed but the tools given in the starting are necessary, if they are not in the procedure then the procedure is incomplete, and not go to complete. All the points are very important in the procedure please do not skip any point, otherwise, the procedure does not complete.
Related Guides