How to repair a punctured sprinkler line. If you want to have lush green fields or lawns then a sprinkler line system is best to install for this purpose. If you see wet spots in soil or grass near the sprinkler line then it means the pipe is leaking anywhere.
Now, you can not ignore this because it is a loss of water and it will increase the bill at the end of the month as well as destroy the lawn or fields.
Its only solution is to find the spot of leakage and then repair it immediately. Before you start to repair the broken pipe, keep in mind that you will have to dig the land carefully so that there should be no harm to the pipe.
How to repair a punctured sprinkler line

If you have installed a lawn irrigation system then it is very necessary for you to know sprinkler line because if you will hire some expert then you will have to pay an extra amount for this and it is a not difficult task. You can easily do it after reading this article.
1. Turn off the water
Before you start to repair the broken pipe, the first job to do is to turn off the water so that there should be no further wastage of water and you can easily dig the dry place.
2 . Diagnose the spot of leakage
The first and most important thing is to diagnose the spot of leakage when you see the wet spots on the grass. Because you can not dig the all sprinkler line to find the leak. There are various methods to find the leakage in the irrigation systems.
- Sometimes you can just spot it by watching the leaking spot.
- Shut off the main valve of water and start to dig at that point where you see the wet spots on the lawn.
- You can also diagnose it by listening to the sound of water flowing from the line attentively.
3. Digging the sprinkler line
After you find the main spot of leakage now it’s time to dig for repairing the pipe. Before you start to dig the land, ensure that water is not flowing from the pipeline. Turn off the flow of water from the main valve so that it does not disturb you later.
You can use any shovel or trowel to dig the land. Carefully dig the patches around the spot because if you will dig roughly then you may break down the pipe more and there are chances that mud can enter the pipe and block the flow of water.
After digging all the land from all sides of the broken pipe now pull out all dirt and clean the area so that you can easily repair the pipe.
4. Clean the pipe
After clearing all the mud from all the dug patches now take a wet fabric and clean the dirt from the pipe. You can also use a cleaning solution to remove the debris from the plastic pipe.
4. Wrap the pipe with pipe sealing tape
Lastly, take a pipe sealing tape and wrap it on the broken part of the pipe in this way that there must no empty space in the hole. Gently press the tape on the pipe to remove any air locks. After wrapping the tape now refills the mud and levels the surface.
5. Turn on the water after 24 hours
It is suggested to you not turn the supply of water from the main valve for a minimum of 24 hours. It is because if you will allow the water to flow from the line immediately then it is not good for pipe sealing tape or flex tape because the tape will lose due to water.
It takes almost one day for the proper grip on the sprinkler line. You can turn on the supply of water after one day to give water to the plants and sprinkles the grass.
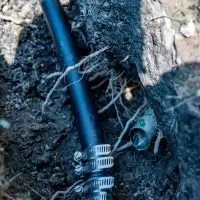
How to repair a broken/ punctured Sprinkler Line
Conclusion
The bottom line of the discussion is that if your sprinkler line is broken and leaking from any place then first thing is to find the place from where it is leaking then you can easily dig and wrap the punctured pipe with any available pipe sealing tape. Make sure to switch on the water after 24 hours.
Related Guides