How to install SharkBite fittings on copper pipe. Installing the SharkBite fittings on the copper pipe is a very easy process.
It’s a doable task at home, measure the pipe’s diameter, and after that cut the pipe cleanly and squarely. Make sure there are no burrs and debris.
Remove any sharp edges with the help of sandpaper. Now insert the pipe into the SharkBite fittings with a slight rotation and by pushing the pipe until it reaches the support tube.
SharkBite fittings are very helpful in repairing and installing the waterline. While the other methods like crimpers, adhesives, or solder are either difficult to install or are very pricey.
SharkBite fittings are the best alternative to all expensive tools for installing the water lines. Moreover, the SharkBite fittings are very impressively easy to install and it’s a matter of minutes.
How to install SharkBite fittings on copper pipe
before we explore the method to install the SharkBite fittings, ensure that you have all the necessary tools with you. the fitting and the pipe should be inaccurate size to avoid insecure connection.
step by step guide to install SharkBite fitting on copper pipe
Choose the correct sized pipe
The first step in installing the SharkBite fitting on the copper pipe is about the selection of the right size pipe.
Many people assume the pipe size refers to the outer diameter but it’s actually the nominal diameter. For the proper and secure fitting, the nominal diameter should meet the requirements.
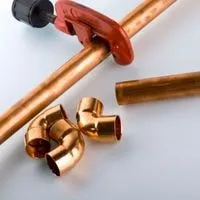
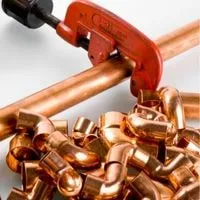
Cut the copper pipe cleanly and squarely
The second step is about cutting the pipe cleanly and squarely. While cutting the pipe, ensure you are cutting the pipe squarely.
It should be clean and free of any debris and scratches. The sandpaper or deburr tools are most suitable to remove the sharp edges and any burrs that can damage the SharkBite fittings.
Use tools to measure and mark insertion depth
Take the dedicated tools like depth to deburr gauge to measure and mark the insertion depth. The use of tools helps to ensure the fitting is installed correctly.
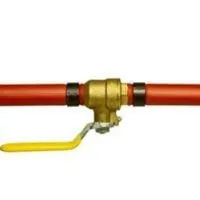
Install the fitting
In this step, you need to insert the pipe into the SharkBite fitting. insert the pipe through the release collar so that it can easily grab the ring.
Now push the pipe with a slight twisting motion. Hold the pipe firmly and push it into the SharkBite fitting with a slight force until it hits the tube spot.
Ensure proper installation
To ensure proper placement, check and verify the depth mark made earlier is within 0.005 inches from the end of the release collar. And finally, the installation is over, turn on the water and check the connection.
Conclusion
Installing the SharkBite fitting for a copper pipe is an easy job but the process of choosing the right size pipe and fitting size is a little bit hard.
However, the job is now easier to do by following our step-by-step guide on how to install SharkBite fittings on the copper pipes. Follow each step as recommended and you will end the process with a secure connection/ installation of SharkBite fitting.
Related guides