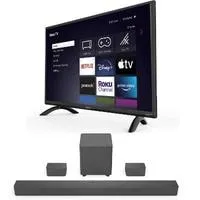
How to connect vizio sound bar to roku tv. The sound bar is an audio device used as a speaker. We all use this device when listening to music; it helps us listen to the music loudly.
It increases the volume of the streaming videos. Some people like loud music, connect this device with any streaming device and enjoy the streaming audio and video.
Connecting is not limited to one way; there are many ways to connect. If one way does not work, you can try another until your device does not connect to the other.
If you connect your sound bar to any device, this is not complex, but if you have an idea about the wires, switches, and apps used to make connections.
How to connect vizio sound bar to roku tv
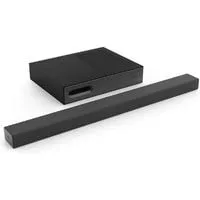
The sound bar not only makes a connection with phones, but it can also make interconnection with TVs and other video display devices, including TVs, computers, etc.
Here are some ways which are used to make the connection between the VIZIO sound bar and Roku TV. If this sound bar does not make a connection in one way, you can change the way of connection with the other.
First, use these ways to connect, and when they are connected, you alter your setting and give a permit and enable the device on the TV as a speaker. Ways are explained deeply:
Way 1:
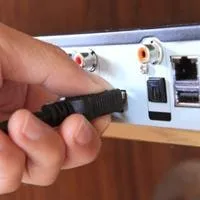
Attach HDMI cable for connection
The first way that I will tell you is the connection through an HDMI cable. This cable connection is solid, and you can use this Cable without checking the sound bar model; this Cable can work with any device model. The procedure for connection is given here:
Step 1: Collect necessary equipment
Before starting the work, you must collect the equipment, prepare it, and start working. Equipment in this way is not complex; just an HDMI cable is required for work.
Nothing is better if you have this Cable in your home, but if you do not, buy it from the market; it is available easily. This Cable is ordinary and easily found at computer and mobile accessory stores.
Step 2: Check Cable and devices for connection
When you have purchased the Cable, you must check the ports on both devices and decide which side of the Cable can be connected to which side.
Most ports of all devices are on their backside. Check the backside and attach the HDMI cable. Attach one end of the Cable with the sound bar and the other to the TV.
Now your cables are attached and the connection is made secure; you have to adjust the settings on the TV, and your sound bar starts working with your TV’s audio.
Step 3: Modify settings on the TV
Now, when your Cable is connected, modify the settings on your TV, allowing your TV to enable this device as an audio device, and you can listen to music.
Whenever you make your connection using an HDMI cable, you have to adjust the setting on your TV, and then the soundbar can work with it. Sometimes when you insert the Cable, an option of the connection setting appears on the screen.
But mostly, you have to go to settings and then adjust settings from there in the following steps:
- When you power on your TV. Go to the “setting” option.
- Click this option, and its sub-options appear on the screen.
- Select the “Control Other Devices” option, and
- your sound bar can easily connect to the TV.
You can connect your sound bar with Roku TV using an HDMI cable.
Way 2:
Connect Using wi-fi
You can connect your sound bar to the TV by using wi-fi. This is a straightforward method for connection. You can connect your sound bar by using a wi-fi connection. It means this is also a wireless connection same as the Bluetooth connection.
No wire is used in this connection, and the mess created by wires is not here; this is a simple, empty, and clean space from the mess. The procedure for this connection is given here:
Step 1: Select Network
Here, you have to select wi-fi for both devices to make the connection. This connection is not intricate. You can connect the sound bar to the TV easily by finding a network.
Find the network and connect it by clicking on the name of the network; when you connect this by fulfilling its conditions, it gets connected and starts working, which is your requirement. Now it proceeds further in the process.
Step 2: Enable from setting
When you select your device as a connection device, you have made the connection. The crucial thing is the enable device from the setting. Here your device is paired with the same connection and enabled from settings.
Go to setting and click on the option ” Control Other Devices.” Through this point, you have to set the device, which is now enabled on TV, as an audio device.
Step 3: Modify and pick the device as Audio
It is the last step after modifying the setting. It is part of the modification, allowing the device to play audio. Now check the setting to inspect whether the speaker is set as an audio device or not.
If not so, search the option “audio control.” This option sets the device as the default device in the setting. When you select this option, your device is set fully as an audio device. It’s the process used to connect the sound bar with the Roku TV, this is a straightforward way, and you can perform it efficiently.
Way 3:
Connection via Bluetooth
It is the last and very common way that you usually use to connect any device with the soundbar. This connection is made via Bluetooth.
Bluetooth connection is very easy for all of us because we mostly use these types of connections in our daily life. It is an effortless way to connect the device by using Bluetooth, and its procedure is given here:
Step 1:Check requirement
You have to check the things that are required for connection. Not very significant things are required.
A Bluetooth receiver is used here, but in case Bluetooth is not connecting. A Bluetooth receiver is the unique requirement of this connection.
Step 2: Make a connection through a Bluetooth receiver
The receiver is the connection device; this is an urgent and suitable device you can use when you make a fast connection. The receiver has switched, and you can use these by plugging into ports to work.
This receiver works only in the condition when it is plugged in. Check the power, too, because it is a power-based device and does not work without power. If you have some power issues, you can purchase a battery-based device. The procedure for this device is not complex; turn it on, and it starts working.
Step 3: Pair devices
When the Bluetooth of both devices is turned on, the next step is to pair these devices if you are desired a connection. Turn the receiver on, turn on the sound bar Bluetooth, and pair both devices.
The blinking light is the indication of the power is on and working. Then fulfill the given conditions that the Bluetooth receiver gives you.
Step 4: Adjust setting and allow the device to work
Adjust the setting after the pairing of a device from the setting. This procedure also has the same option to select from the setting.
Go to setting and click “Control other devices” here; this device is recognized as an audio device. If you want to set this device as default, then use the option “System audio control,” this option sets the device as the default device; next time, you do not need this lengthy procedure. Your VIZIO sound bar can easily connect to your Roku TV.
These are some ways that are used to make the connection of the VIZIO sound bar to the Roku TV. If you follow the given instructions, there is no chance for the error to come in working. It can also help you reduce the errors that can come in your way of working.
How to connect vizio sound bar to roku tv
Related Guides