Xbox one s motherboard replacement. Everything digital and specially designed for some purpose has its motherboard where all the wires and the buttons and the system of that things is designed.
This motherboard is a component or the part which is the main out of that thing there is the working about the Xbox, so here is the discussion about the replacement of the motherboard of the Xbox.
This replacement is not more complex; it is easy, but the case you have information about it. Without knowing this, you do not get to proceed next to work.
Xbox one s motherboard replacement
There the Xbox motherboard gets worse, and there is a big issue coming into it; that issue is as severe as you do not try to solve it quickly, and you need to replace those things for the good result as you want your Xbox one S working.
Minor issues can be solved easily, but the big issue needs replacement; otherwise, this is not possible for it to work.
The replacement procedure of the motherboard of the Xbox is given there.
Step 1: Flip the Xbox
The first step is to flip the Xbox and take it from the other side; this means3 you can return this to the other side to start work. Because this is designed as this does not open from the side in which it is lying.
Changing its position is one very common thing and its first step; without this step, there is nothing possible as if you do not reverse it, it does not open.
Step 2: Search the area and remove the case
There you have to remove the case. Mostly the cases of the Xboxes are the same as the case of the CPU. This case has no nuts or other things used to make it tight. Search the area where is the place of opening and open the case of the Xbox.
Take the case upward and remove all the things used for tightening. Remove all the clips in the case, and they carry all the purposes of the nuts and tight the case.
When you removed all the clips and other things used, you can now take the clips up and remove the whole back of the Xbox. This part is the back of the case, and this bottom needs to open when you replace the motherboard.
Step 3: Remove screws and separate cases
When you open the bottom, you must remove all the nuts. These nuts are very small and need a special, very small size screwdriver.
Otherwise, these are not opened. The plate type contains the nuts; if you want to open the Xbox, you have to remove all these nuts.
Now, when the screws are removed, and everything is ready to proceed next, you have to separate both cases whether these are white and the other one that contains the screws which you removed.
Step 4: Remove the hard disk and also optical disk
When you separate them both now, you are in the place where you start removing the internal components, including the hard disk and optical disk drive.
First, you must remove the hard disk and then the optical disk. Now you know the procedure of removing the hard disk.
This disk is very easy to remove, but the care you must take is about the wires, and these wires as they are too sensitive and do not bear any jerk.
Step 5: Take the Hard drive completely up
Now the first thing you do after the hard disk removal takes the hard drive completely up, and there is no issue with its plastic wires.
Keep in mind that these plastic wires do not get disturbed; they have no issue. Take care of them so that they do not damage.
Step 6: Remove silver plates
Now remove the silver plate that is on the back side of the Xbox, and the motherboard is hidden in that silver plate; these plates are removed when these screws are removed, so now you have to remove the screws and 4remve that plate to see the motherboard.
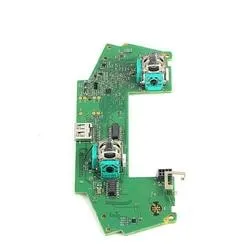
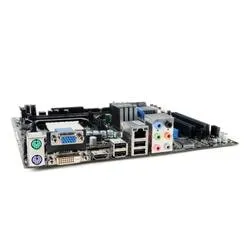
When screws are removed, the plate is also removed, and the whole view looks good, remove these things. A green rectangular type plate occurs there; this is the motherboard of many things, and now take this up and put the new motherboard in its place.
Step 7: Set and close the Xbox
Set the motherboard in the place where you have removed the old one, and this is the place where this thing is necessary place. When you have arranged this thing, apply the whole procedure in reverse mode.
This means now this procedure ends at the place where you have started the whole procedure. All the above-given tools are necessary, and this procedure is very easy, and you can do it on your own.
Now you must join all the components you separated, keep them all in their places, and join them. Join the hard disk, optical disk, white and silver plates, and join all the screws.
Close the inner and outer case and take the Xbox back to its natural state. Now, you flip it back and place it and check whether it is working or not.
If you have done the same procedure that I told you, this is set entirely, and it works well, and there is no chance of getting worse and an error coming into it.
Here, the motherboard settings are very easy, and this is the same procedure, but you have to do it in reverse, which comes back into the before state. Which it was in before.
Related Guides