How to insulate a finished garage. You can insulate the finished garage; insulation is used as an alternative to the season.
When the season is warm, insulation can make the room more relaxed for you, but when the season is more incredible outside, these insulated walls can make your garage warmer, and you can work efficiently in it.
This remains best for you in both seasons, whether hot or cold. You can efficiently insulate your garage. This may be a bit difficult, but if you work, it is not impossible for you; you can do it if you want and work hard.
How to insulate a finished garage
You can insulate the finished garage. This is a bit difficult procedure for you because you are not a professional. For professionals, this is not hard because this is their daily work, and they do not take it hard because they are experts in their work and did it very well.
Which is a bit difficult for you. Some materials are necessary for your work, insulation, insulation kit, foam, drywall, Gloves, and a safety dress.
Step 1. Clean the walls and prepare them
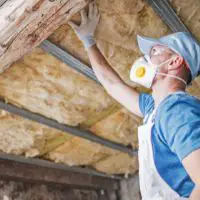
Starting, you have to clean the garage walls you want to insulate. If any dust, dirt, or other extra material is on the wall, then you should clean this and make the wall ready for the insulations.
For these types of work means the insulation or the paint; you have to clean the area where you are going to work and then start next. This cleaning is not limited to the walls; you should clean the whole garage and remove all the extra material in it.
Take all the extra material out from the garage, including every type of thing in it that is related to the garage work; take all extra stuff and clear all the molds of chemicals. When you clear all the things, your garage is cleaned and prepared for the insulation.
Step 2. Apparent cracks in the walls
The second step is clearing cracks and the walls’ gaps. Insulation is installed when your cracks, gaps, and all types of things are cleared. This is a type of the gaps cleared by filling these. Here is the use of foam; foam is used for filling gaps and cracks in your walls; these come when your walls get damaged.
You have to clear the damage in the walls; foam is used for the filling. Please put it in the spray can and shake it well for about 2 minutes or more.
Now start spraying it in the gaps; when you spray this foam, your foam starts expanding. It will not expand when you spray it; it starts expanding, and it will take about half a day to get more complex and fit in the wall.
Step 3. Start insulation, covering with drywall
You have to start insulation after filling the wall gaps, and getting more challenging. Measure the insulation with a piece of wood and start cutting it; this wood piece is the indication for the cutting.
Cut the insulation for the size of the studs which you are using; cut it by using a knife, and also fit it into the stud. Now when all the pieces of insulations are cut and fixed, you have to fix them and then paste them on the paper; it is straightforward to staple them. Remind one thing you should start to staple the downward insulation direction of the stud.
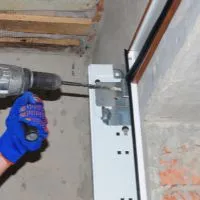
Now when your insulation is a staple on the stud now, you have to do the covering it with the drywall. Drywall uses screws for its working, and you have to attach it with the screws which are screwed on the insulation and join them to each other.
As these use the screws, you should place the screws near each other so the wall does not get loose and may get damaged when it is loose.
The paper which is used in the insulation you do not change or move from the place, these are very much dangerous, and if you move them or try to remove them, it can result in a fire.
These are dangerous as they are attached by default and do not move. Covering the insulation with the drywall is very important; without this coverage, there is a big chance of rubbing the insulation, which may cause a hazard. This is the cause that the safety dress and the gloves are essential in this procedure.
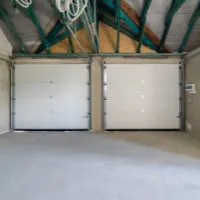
Step 4: Ceiling and door insulation
In this step, there is the insulation of the garage door is here; you have to know about the insulation of the garage door you are going to insulate the garage door.
This also needs a more complicated material, and as the door is not flat so hard material is used for the smoothness and flatness. The insulation is in the cut form for steel doors, but the other needs the cutting and then place the insulation on them.
As the insulation is of heavyweight, then you can manage the door first and take care that it does not pull down. It has a heavy weight and may also not manage that weight.
Now you have to check the insulation of the ceiling and the door; when you want to insulate the garage, these are also important for the insulation. You have to insulate them both for the excellent insulation. Use thicker insulation for the ceilings.
The insulation used for the ceiling is rigid, and it can take a long time; if it is hard, then it also manages the ceiling as there is no support used for the insulation. It has to stick alone.
Insulate your garage!
Related Guides