How to fix a broken necklace. Jewelry is a part of women’s lives; their lives are not complete without these things. Even you may say that they do not suffer without it. Not only these days, but this is also an ancient product that women use to increase their beauty.
When they take these types of things, they feel they look good. Women may not compromise on it; they are sensitive about their things.
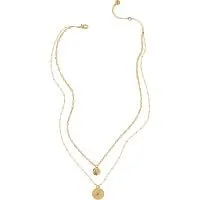
There is a necklace that is broken, and here we have to repair this necklace, as this necklace is very precious otherwise we don’t need to repair a cheap thing we always take care of the things that are close to us.
How to fix a broken necklace

Fixing the broken necklace is complex but not impossible, and you can do it if you want to fix it here. I will provide you with the proper guidance about it.
If you are searching for the best guiding person, then congratulations, you are in the right place. If you want to fix the broken necklace, then you have to follow the given steps:
Step 1. Take the chain and check
In the first step, you must take the chain and check this chain here. Checking means observing the chain from where it is broken; you may say the reason behind breaking the necklace chain.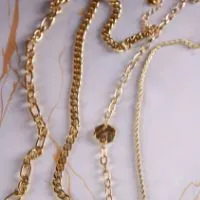
Observing the chain is necessary for the work because you learn about the defect and the tools you will use here. You also observe how much time, force, or other things are required to repair the necklace.
Step 2. Gather the tools
In this step, you have to gather the tools; The tools are not very big; these are small as the chain used in the necklace is also very small. Most of the necklaces are made of chains, which are very small in size, and this is very difficult for us to examine the break.
The tool required here is the needle tip like a thin plier. This plier is mostly in your homes. If this plier is not available in your home, you can also use the hairpin, which is very useful for you.
Step 3. Open the chain mouth
When you gather the tools, take the chain and start opening its mouth, the end from where the necklace is broken. You may say this mouth of the necklace chain.
Take the thing you decided to open the chain end and start opening it until it does not open completely on the limit where it can get fixed on the other end of the chain.
Keep one thing in your mind is that you have to open only one end, not both. And open the end which is broken, as the broken end opens easily and you can insert the chain in it easily.
Step 4. Enter another end
After the opening process ends, enter another part or end of the chain in the second end to join or close this. As the chain is very thin, you have to enter its part and then take it with the thing that can easily take the chain and helps you enter this part in another part.
Please enter in a way that its sequence does not get disturbed. Otherwise, it may need a changing means of replacement. So carefully insert the chain into the other end.
Step 5. Close and Tight the chain
In this step, when you enter another end, pull the chain ends to close, now, retake the plier and use this for tightening the chain. Close them very tightly and do not allow them to open again soon.
Now take the plier and tight the chain forcefully from all angles, which means rotating the chain and closing all its ends with full force so that they join completely and do not get back. If you observe any back in it, use the force again and tight it.
Now take the plier back and hold it for a short time, now take the chin in your hand and from both side and take it like the strip, now pull both ends of the chain back and observe the chain that now where the break was, how it is looking after repairing, or there is any change is prominent in the chain.
After pulling the chain, if it is not separated and gives you the best result, this is now ready for your use.
Related Guides